
CCTV System Support
Offering professional CCTV system support and services requires a mix of structured deployment, reliable network configuration, and responsive troubleshooting. Whether you are standardizing a service portfolio for commercial clients or refining your internal support processes, having a clear framework is essential.
Here is a breakdown of what a comprehensive CCTV service and support structure looks like.
Core Service Offerings
A robust service portfolio typically covers the entire lifecycle of the surveillance system:
- Site Assessment & Design: Mapping out camera placement for optimal field of view, calculating PoE (Power over Ethernet) budgets, and planning structured cabling routes to avoid interference.
- Installation & Configuration: Physical mounting of cameras (Dome, Bullet, PTZ), terminating Cat6/Cat5e cables, and configuring the Network Video Recorder (NVR) or Digital Video Recorder (DVR).
- Network & Remote Access Setup: Assigning static IP addresses, configuring port forwarding or P2P cloud access, and setting up secure mobile/desktop monitoring for the client.
- Annual Maintenance Contracts (AMC): Scheduled visits for lens cleaning, firmware updates, checking hard drive health, and verifying recording retention policies.
Visualizing the IP Camera Network
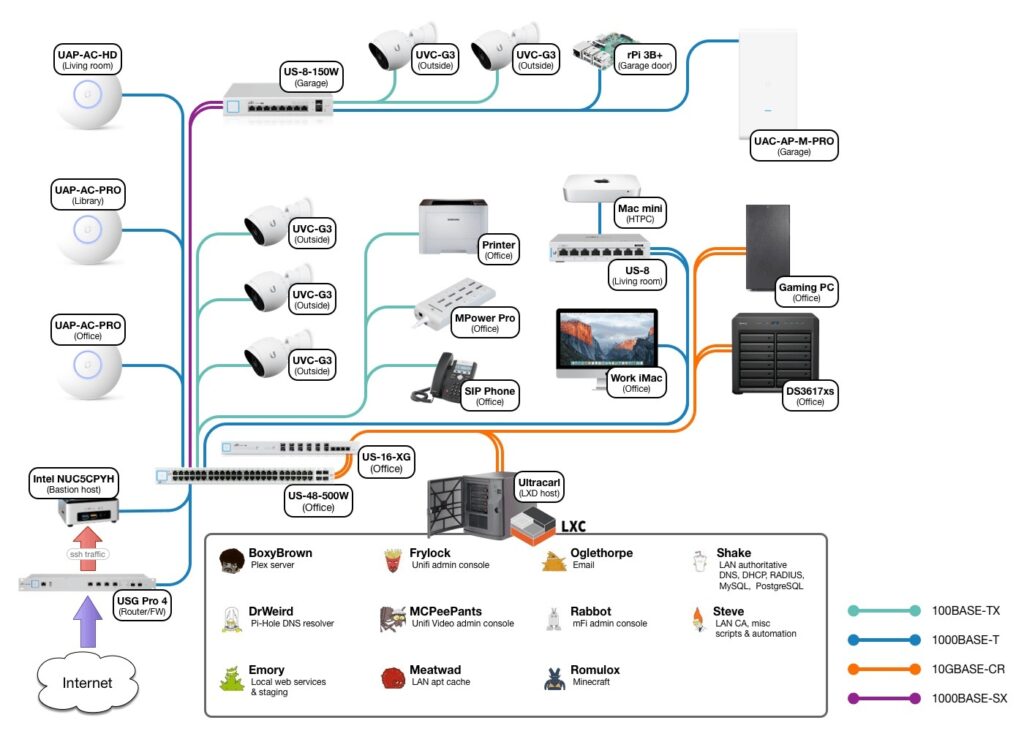
Understanding the exact data and power flow is critical when isolating connection issues. The interactive diagram below breaks down a standard IP camera topology. You can explore how power and data move through the system to help pinpoint failure points during a support call.
Tiered Troubleshooting & Support
When dealing with IP cameras specifically, support usually falls into distinct technical tiers. Having a structured troubleshooting path reduces downtime for the client.
1. Physical & Power (Layer 1)
- Symptom: Camera is completely offline or constantly rebooting.
- Action: Verify the Cat6 cable integrity using a cable tester. Check the PoE switch to ensure it hasn’t exceeded its total power budget (especially if multiple IR/PTZ cameras draw power at night).
2. Network Connectivity (Layer 2 & 3)
- Symptom: Camera powers on but cannot be discovered by the NVR.
- Action:
- Ensure the camera and the NVR are on the same subnet (e.g., both on
192.168.1.x). - Ping the camera’s default IP address from a laptop connected to the same switch.
- Check for IP conflicts (two cameras assigned the same static IP).
- Ensure the camera and the NVR are on the same subnet (e.g., both on
3. Video Stream & Storage (Application Layer)
- Symptom: Camera is online, but the video feed is lagging, artifacting, or not recording.
- Action:
- Adjust the bitrate and frame rate to match the network’s bandwidth capacity.
- Check the NVR’s storage status to ensure the hard drive hasn’t failed or been set to “stop recording when full” instead of “overwrite.”
- Verify ONVIF compatibility if mixing camera and NVR brands.
CCTV System is very much required in the state of Manipur due to volatiles situation.
And it’s good to know that such services are available at Imphal Manipur.
Thanks for your valuable feedback.